


Soybean Juice“豆汁儿”(dòu zhī er).
At the lively entrance of a hutong, a small stall displays a row of weathered clay pots, filled with an ancient and enigmatic beverage known as Douzhi. This is one of the most classic features of old Beijing, and its taste seems capable of traversing time, transporting individuals back to the ancient streets. Douzhi may appear modest but holds boundless artistic conception within. As one lifts the clay pot, tilting it gently, the dark liquid flows out slowly, exuding a strong fragrance. The aroma combines the richness of beans with the essence of the land, irresistibly immersive. Placing down the clay pot and raising a glass cup, the beauty of Douzhi unfurls. The faintly yellow liquid undulates within the cup, resembling an abstract ink painting. While looking up at the Douzhi in the cup, it feels as if one can witness the sedimentation of years, the passage of history, and everything becomes incredibly vivid yet distant.
Comprehensive rating:
| PREP TIME | COOK TIME | VARIETY | MOUTHFEEL | LEVEL |
| 4320 min | 5 min | 1 | Slightly sour, with a hint of bitterness. | Moderate |
Ingredients for Douzhir :
| Mung bean | 500g |
Steps:
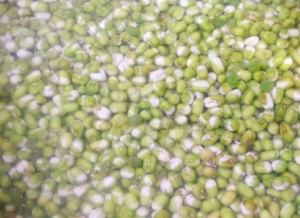
1.Select high-quality mung beans, ensuring they are intact, clean, and free from bad beans. Then, place the mung beans in a large bowl or container and pour enough water to fully soak them. The water helps remove impurities from the surface of the mung beans and provides enough moisture for the subsequent grinding and fermentation process. Once the mung beans are fully soaked in water, cover the container and let it sit at room temperature for 24 hours. This waiting time is necessary as it allows the mung beans to gradually absorb water, becoming soft and easy to grind.
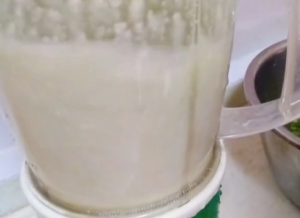
2.After the mung beans have soaked for 24 hours, take them out and rinse them thoroughly with clean water. At this point, you will notice that the mung beans have become soft and slippery, and the skin will be relatively loose. Prepare a large bowl and place the soaked mung beans into it. Then, rinse the mung beans thoroughly with clean water while gently rubbing them with your hands to help remove the skin. You may observe that during the rinsing process, some of the mung bean skins will peel off and float in the water. Continue rinsing and rubbing until most of the mung bean skins are removed. Next, prepare a blender or food processor. Pour the cleaned mung beans into the blender, add an appropriate amount of water, usually 1 part mung beans to 3 parts water. This ratio can be adjusted based on personal preference; if you prefer thicker soy milk, you can reduce the amount of water. Cover the blender and start blending. Choose high speed and blend for 2-3 minutes until the mung beans are completely broken down and form a smooth slurry. At this point, you can pour the soy milk into a large container. Use cheesecloth or a fine mesh strainer for filtration. Place the cheesecloth or strainer over another clean container and slowly pour the soy milk, allowing the liquid to pass through the filter while retaining solid particles on top of the filter.
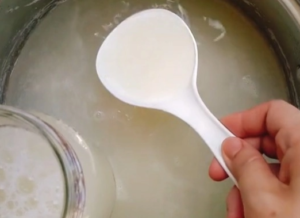
3.Pour the blended soy milk into a wide-mouthed container. Choose a container slightly larger than the volume of soy milk to allow enough space for the sedimentation process. Carefully place the soy milk container in a cool and well-ventilated place, ensuring no direct sunlight hits the soy milk. Temperature and environmental conditions also influence sedimentation, so it’s best to choose a relatively cool place, avoiding exposure to high temperatures or humidity. Remember, during the soy milk sedimentation period, do not shake or disturb the soy milk container. Slight vibrations may disrupt the starch precipitation process, resulting in suspended particles in the soy milk, affecting its taste. Wait patiently for 3 hours, allowing the starch in the soy milk to gradually settle at the bottom of the container. You will see a layer of white starch sediment at the bottom, while the upper layer of liquid becomes clear and transparent. After 3 hours, carefully remove the starch film on the surface of the soy milk from the container using a spoon or other tool to maintain the purity of the soy milk. At the same time, you can pour the upper layer of soy milk into another clean container to better preserve the texture and taste of the soy milk.
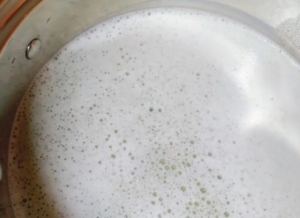
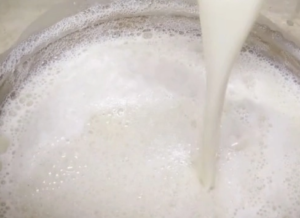
4.Pour the filtered soy milk into a large pot, leaving enough space to prevent overflow during fermentation. Gently skim off the foam on the surface of the soy milk with a spoon. These bubbles are produced during the fermentation process. Skimming off the foam prevents it from interfering with the texture and taste of the soy milk during fermentation. Next, place the pot in an environment at room temperature between 28-30 degrees Celsius, preferably in a warm, well-ventilated, and relatively stable place. Such environmental conditions help promote natural fermentation of soy milk. Allow the soy milk to ferment naturally at room temperature for 48 hours. During this period, the microbial community involved in fermentation gradually multiplies, and the taste and texture of the soy milk change. Over the 48-hour fermentation period, the soy milk will become slightly sour and emit a unique aroma. Note that within these 48 hours of fermentation, try to avoid moving or shaking the pot of soy milk. Keeping it undisturbed helps ensure a normal fermentation process, while interference may affect fermentation results.
5.Pour the fermented soy milk into a large pot. Place the pot on the stove and heat the soy milk over medium-low heat. During the heating process, be careful to control the heat and avoid boiling the soy milk. Therefore, constantly monitor the temperature, ensuring it does not reach the boiling point. When the soy milk is about to boil, you can gradually add fresh soy milk. You can add it in batches, adding an appropriate amount of soy milk each time, and waiting for the temperature of the soy milk to rise close to the previous boiling point before adding the next batch. This repeated addition process ensures that all the soy milk is fully heated and helps improve the texture and consistency of the soy milk. Remember, throughout the cooking process, do not let the soy milk boil. Boiling will destroy the texture and nutritional value of the soy milk. Once all the soy milk has been added to the pot, turn off the heat source and allow the soy milk to cool naturally.
Tips:
- Choose high-quality beans: Using fresh and high-quality beans to make soy milk can provide better taste and texture. Make sure the beans are not spoiled or damp.
- Control the heating temperature: When heating the soy milk, be careful to control the heat to prevent the soy milk from boiling. Boiling can ruin the texture and consistency of the soy milk. Maintain medium-low heat and stir the soy milk continuously to prevent boiling.
Gently sipping, the richness and slight bitterness of Soybean Juice rush into the mouth. The delicate texture and unique flavor interweave on the taste buds, like a marvelous concert. The taste of Soybean Juice is akin to the breath of ancient memories, quietly awakening dormant emotions in the heart. Tasting Soybean Juice is not just about enjoying food, but also about appreciating the beauty of life. Reflecting on the passage of time and the changes of the years, one can sense the weight of history and the depth of tradition.Soybean Juice is a journey through time and space, connecting with ancient culture and experiencing the charm of this city. Soybean Juice is more than just a beverage; it is an emotional sanctuary. Each sip of Soybean Juice carries people’s reminiscence of memories and respect for the past—it represents the memory of old Beijing and a warm glow in the heart.