


Tiger Skin Chili Pepper, like a touch of morning glow in the mountains, shines upon the taste buds. Its wrinkled skin resembles tiger stripes or autumn leaves, while its internal spiciness is akin to the fierce and scorching summer sun. Each chili pepper tells a story, as they sizzle and swirl in the frying pan, boiling up an enticing flavor. Every bite feels like strolling among the clouds, with the magical sensation of spicy and sweet intermingling, as if being immersed in a landscape painting, making one linger and never want to leave.
Ingredients for Tiger Skin Chili Pepper:
| Green pepper | 500 |
| Garlic | 10 |
| Coriander | 5 |
| Salt | 2 |
| Sugar | 1 |
| Light soy sauce | 3 |
| Aromatic vinegar | 3 |
| Small chili pepper | 5 |
| Chili oil | 5 |
| Sesame oil | 5 |
Step:
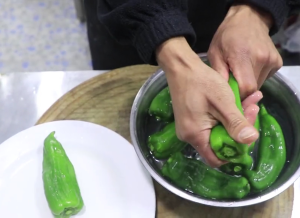
1.Firstly, prepare the ingredients. Select a few green peppers and remove the stems from the top. Wash the green peppers and place them in a bowl or plate. Next, gently squeeze the green peppers to flatten them slightly. This helps to change the shape of the peppers, making it easier to achieve the tiger skin effect when frying. After flattening the peppers, return them to the bowl or plate and get ready for the next step of cooking.
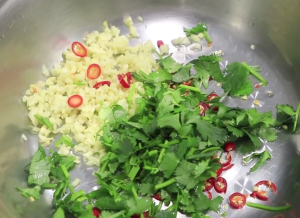
2.While preparing the green peppers, also prepare some garlic. Use your hand to crush the garlic cloves and then chop them into small pieces. You can adjust the amount of garlic according to personal preference to enhance the flavor. Additionally, prepare three small chili peppers and slice them into rings. Also, a few sprigs of cilantro, chopped finely. Mix the chopped garlic and cilantro together until well combined. This combination of ingredients will add rich aroma and spiciness to the tiger skin chili pepper dish.
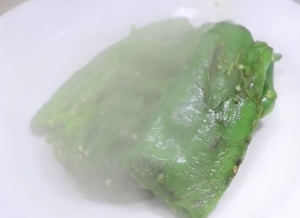
3.Before starting the cooking process, heat the pan without adding any oil. Adjust the heat to low and directly add the green peppers to the pan for stir-frying. During the stir-frying process, make sure that all parts of the green peppers come into contact with the bottom of the pan. If there are areas that don’t touch the pan, gently press them down with a spoon to ensure even stir-frying. Keep continuously stirring the green peppers until their skin starts to wrinkle, which should take around 3-5 minutes. Slowly stir-fry the green peppers until they are partially cooked, soft but still retain some texture.
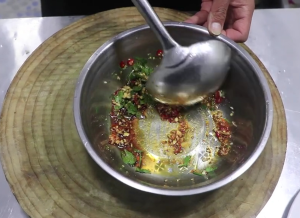
4.Next, let’s prepare the sauce. In a plate with the minced garlic and chopped cilantro, add 2 grams of salt, 1 gram of sugar. Then pour in 3 grams of light soy sauce, 3 grams of vinegar, 5 grams of chili oil, and 3 grams of sesame oil. Use a spoon to mix all the seasonings together until fully dissolved and blended. Ensure that all the seasonings are well combined, creating a delicious sauce. By preparing this sauce, you can add more flavors and depth to the tiger skin chili peppers.
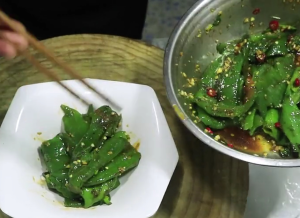
5.Pour the stir-fried green peppers into a bowl, making sure they are evenly coated with the sauce. Use chopsticks to gently pick up the green peppers and transfer them to a serving plate. Finally, pour the remaining sauce over the green peppers, allowing them to soak in it thoroughly. This enhances the flavor and texture. Now, the tiger skin chili peppers are ready to be served!
Tips:
1.Wash the green peppers thoroughly, remove the stems and seeds from the top of the peppers. Be careful not to cut through the entire pepper, as it needs to remain intact to achieve the tiger skin effect.
2.Once one side is golden brown, gently flip the chili peppers with a spatula and continue frying the other side. Avoid over-flipping or flattening the peppers to maintain the integrity of the tiger skin.
On a starry night, a plate of Tiger Skin Chili Peppers ignites the taste buds like sparks. Those peppers, like little tigers, with their slightly bulging bellies, adorned in their tiger-striped coats, eagerly tell their stories. Each bite feels like plucking stars from the night sky, with the unique spiciness shining brightly like starlight, leaving you wanting more.